

Security is a vital factor to consider while uploading images to either your blog or social media. You have to protect your images to prevent others from stealing. Are you wondering how the images can be protected? You have to make use of software products such as Photomarks using which you can visually watermark images in batch mode either for your desktop or smartphones. In this review, we will examine the features and working of Photomarks tool.
Photomarks Features
With the help of PhotoMarks, you will be able to personalize the appearance of text and logo watermarks. You can also perform advanced editing such as resize, rename, auto rotate including the ability to add Graphical Frames to your photos. The tool works by leveraging the advantage of multi-core processors to boost the editing photos in batch mode. It’s also possible to save your settings as profiles for future usage. Alternatively, you can work with image watermarker for iPhone app using which you can watermark photos on iPhone, iPad, or iPod Touch.
The PhotoMarks provides support for batch processing for multi-core processors. The product generates customizable text Watermarks with pixel-perfect positioning, tile mode, rotation, multiline text, shadow, stroke, bounding-box, custom font, textured fonts, and much more. The Smart resize filter clearly distinguishes between landscape and portrait photos. This will reduce image size in pixels. The Auto Rotate filter automatically rotates photos to the correct orientation. You can decorate Photos with Grunge, Vintage, Picture, Shadown Effect, Simple Border, and Shape Frames. You can either upload the Photos to FTP, Flickr or send via email. You can easily preview from within the PhotoMarks app. The tool provides support for 50 image formats including RAW formats from DSLR digital cameras.
Installation
The Photomarks app can be installed just like any other software product. You have to follow the instructions displayed on the screen. You also will have to input your license key if you would like to experience the complete features bundled with the product.
Working with PhotoMarks
To work with PhotoMarks app, you should double-click the icon from the desktop. You can also navigate the app via the Start | All apps menu. You will view a dashboard as shown below
You can either drag and drop or select the “+” button to add new Photos. You can add any number of photos for the purpose of watermarking and editing. Let’s add a photo to the canvas to get started. The PhotoMarks dashboard after adding the photo will look as shown below
The photo will display as icon and a preview will be displayed on the bottom right side. You can add additional photos by selecting “Add Photos” button. You can also add folders where the photos are located by selecting “Add” button. You can also select the size of the icon by selecting “View” button.
The next step is to select “Edit Photos” button, which will enable you to add watermarks and filters. We reviewed with several watermark products previously but they only perform the work of adding watermarks. The highlight of PhotoMarks tool is that you can add filters, which will add beauty to your photos while sharing on social media.
If you select Edit Photos button, the user interface will change as shown below.
The next step is to select “Add Filter” button. You will view a dialog as shown below
You will find four icons on the left side of the dialog. The All Filters icon enables you to access all options such as watermarks and attractive filters. The Marks icon enables you to access only those options that are enabled for watermarking. The Decorate and Transform icons helps you to access filters. The product has merged all the options from the three icons into the first icon. The more you work, the more you become familiar with the PhotoMarks app.
Adding Watermarks
To add watermark to the photos, you should select “Add Filter” button. The next step is to select the Marks icon from the left-side navigation panel. You will view the below screen.
You have to select the type of watermark such as Text, Logo, or Mask. Let’s try to add a text watermark. The below screen will be displayed.
You can enter the watermark text, alignment, keyword, placement position, and much more. You can specify the relevant font by selecting Font tab as shown below.
The PhotoMarks app enables you to draw bounding box and shadow by selecting “More” tab. Let’s change the watermark text inside the Text box. You can either drag the watermark at the desired location or can select the appropriate option from the Placement drop-down box.
You can also rotate the watermark text according to your preference. We rotated to 40-degrees and the resulting output will look as shown below.
Let’s try to add a filter to a Photo. You have to add Photo and select Add Filter button. You can either select a filter by selecting “All Filters” option or you can select “Decorate” and “Transform” options. We selected Vintage Frame option. You will view a screen as shown below.
You can easily decorate photos with vintage look and feel. Interestingly, the PhotoMarks app ships with several styles as shown below.
For instance, if you select Style 2 option, you will view a preview as shown below
You should note that the total number of styles will vary depending upon the filter. For instance, if you select “Grunge Frame” filter, you will view a screen as shown below.

You can play with each style to know their difference. It will take some time for you to know the function of each filer. However, you will not be able to find any other competing watermarking products with filter. The PhotoMarks app team has done a credible work to provide a tool that you can bank upon.
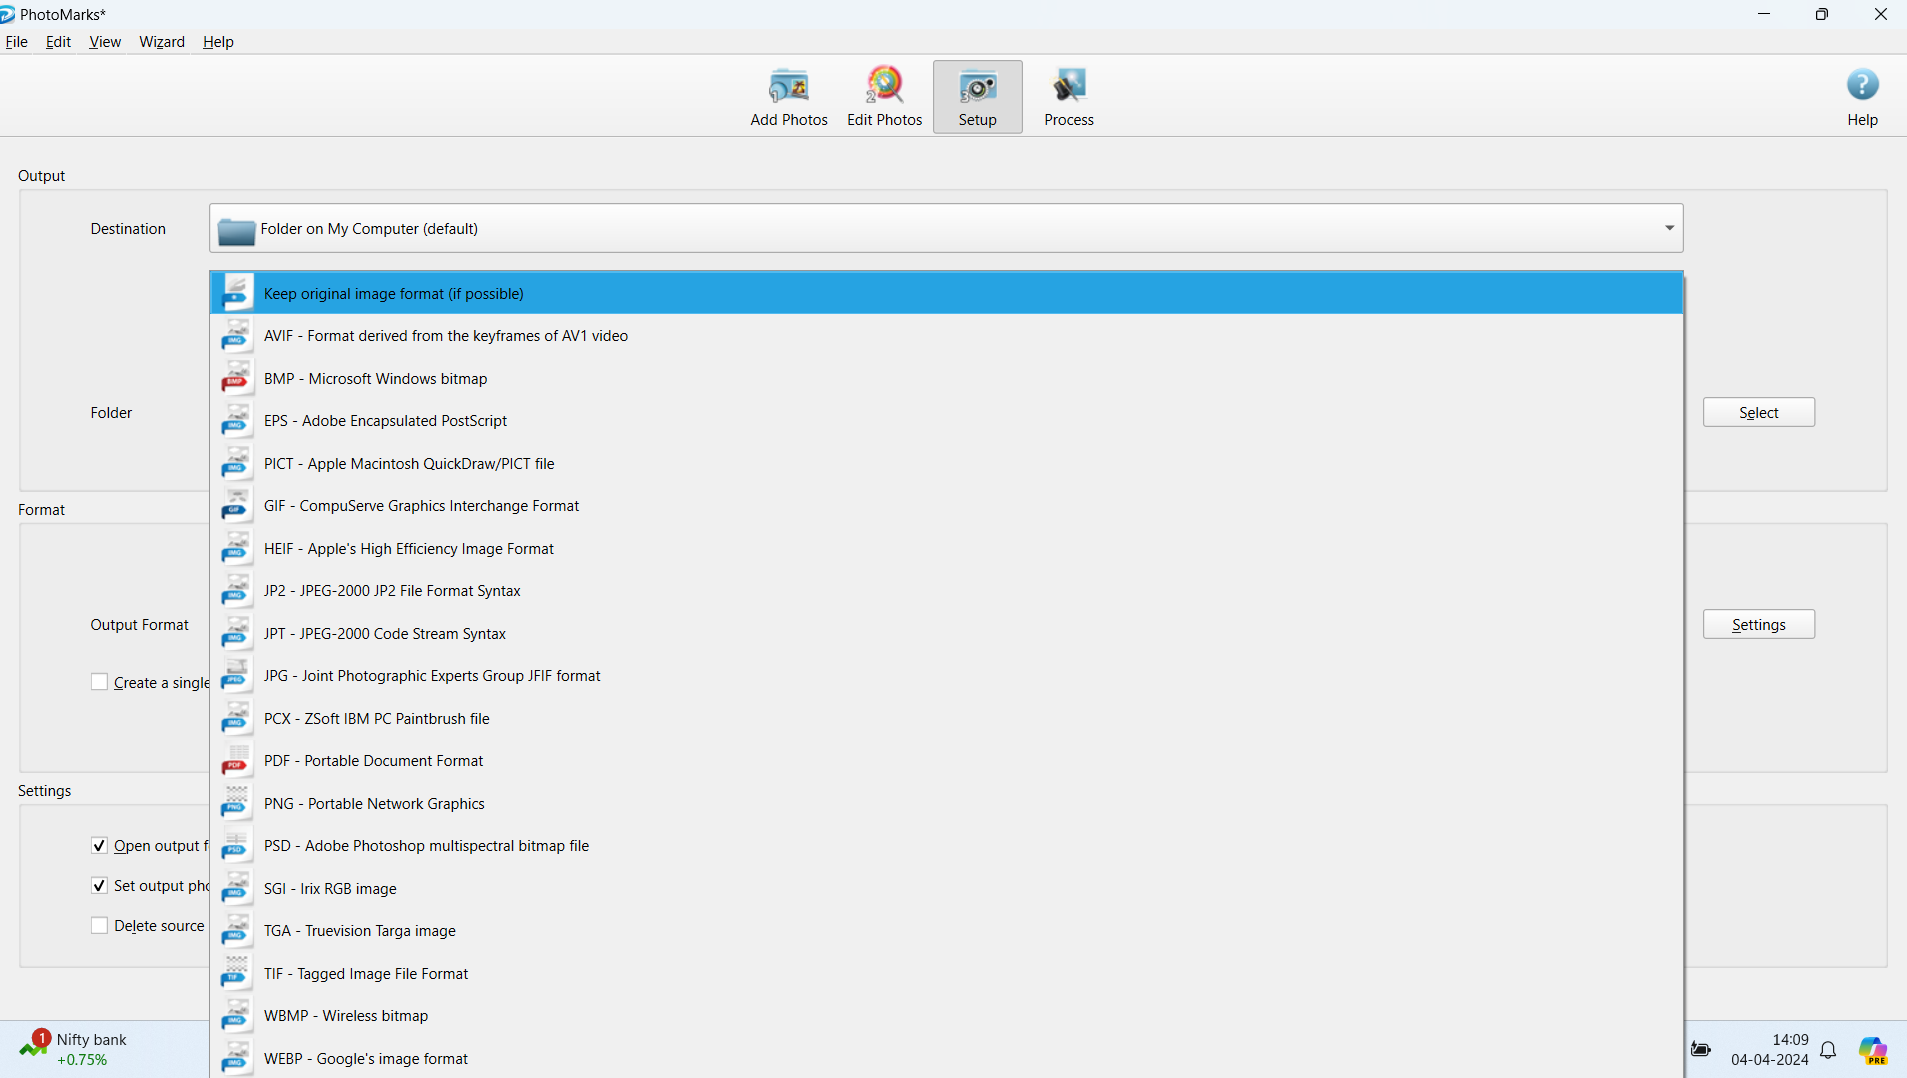
Changing Output Folders
You can modify the default output folder by selecting the Setup option from the Toolbar.

You can specify the output format by selecting the “Output Format” option.
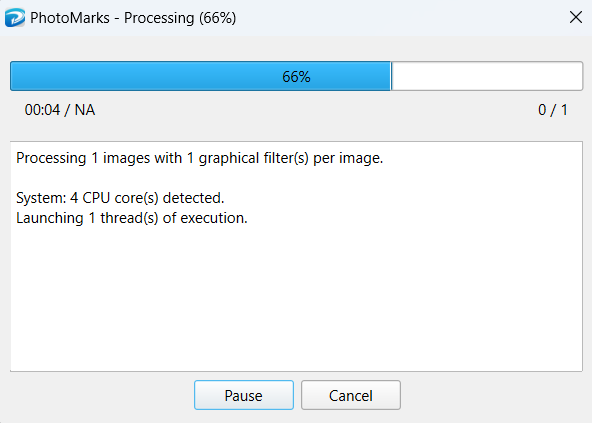
Processing Watermarked Photos
To generate watermarked photos, you should select “Process” option. You will view a message box as shown below, which prompts for your confirmation.

The PhotoMarks app displays the progress bar during the processing stage as shown below.
The relevant output folder will open automatically. You can now make use of the final watermaked photos on your blog and social media.
Conclusion
If you are a blogger, then you have to protect your Photos and the PhotoMarks app does a great job. We found that the app works very fast and the Photos are processed quickly. Moreover, the app ships with plenty of new features such as filters that are not available with competing apps. The vendor provides excellent support via email. We highly recommend PhotoMarks app for all your watermarking requirements. The company provides 60-day money back assurance in case if the product doesn’t meet your expectations. However, we are sure that you will like this product because of the abundant features.
Photomarks
$29.95
Pros
- Quick Installation
- Simple User Interface
- Plenty of options
- Availability of filters
- Fast processing
- Comprehensive documentation
- Excellent technical support
Cons
- More advanced filters needed
more recommended stories
 MagFone iPhone Unlocker Review: Unlock iPad without Passcode
Apple iPhone, iPad, and iPod touch.
 MyRecover Review: Smart Data Recovery Tool
Nowadays, data has become an inevitable.
 Tuneskit Audio Capture Review: Brilliant & Simple Audio Recorder
Imagine a scenario where you need.
 HD Video Converter Factory Pro Review: Amazing Video Management Tool
Nowadays, videos have taken over the.
 ZEDGE Review: Is it a better app for wallpapers?
Do you want additional wallpapers and.
 YouCam Perfect Review: Is it just another image editing app?
Nowadays, smartphones have become part and.
 X Launcher Review: Is it an impressive launcher app?
Normally, you work with the standard.
 WebbyStocks Review: Will it deliver results?
Are you running a blog? You.
 VidClipper Review: Ambitious Video Management Tool With Flaws
Videos are becoming new normal. Hence,.
 URL Capture Pro Review: Does this tool serve any purpose?
Do you want to convert a.
Leave a Comment